

If you're working with cloud services, or probably any kind of services, you're most likely working with JSON, XML (e.g. SOAP web services) or both. Although TDI provides specific components for handling web services, there is an easier approach to deal with both formats quickly and flexibly - and in the exact same way - if you're ready to do a little scripting. This is a quick tutorial to get you started with TDI's hierarchical Entry features - or hEntry for short.
As an experienced TDIer, you know that data in the system is carried around in Entry objects. Each Entry holds zero or more named Attributes. Each Attribute contains zero or more values. Each value is a specific Java object used to represent the actual data content of that Attribute. We'll call this a 'flat Entry', since it represents a one dimensional list of Attributes - like a directory entry or a database table.
As of version 7, the Entry now has an hierarchical mode to represent a tree of data. hEntry mode is enabled automatically when you create an Entry based on hierarchical data, for example parsing XML or JSON. You can also explicitly call the enableDOM() method of an Entry, which then makes the DOM Interface functionality active and available. Or you can just add hierarchical attributes to it.
hentry = system.newEntry() // hentry is still flat
hentry.root = null // now it has a single attribute
hentry.root.branch = null // it's become hierarchical now
hentry.root.branch.leaf = "Green" // add a node with a text value
The above script creates a tree of data in the form of an hEntry. You can get the XML representation like this:
task.logmsg(hentry.toXML())
Here is the output:
<root>
<branch>
<leaf>Green</leaf>
</branch>
</root>
And produce the JSON version like this:
task.logmsg(hentry.toJSON())
Which gives you the following:
{"root":{"branch":{"leaf":"Green"}}}
At this point it might help to know a little about how DOM (the XML Document Object Model) works. Here is where I learned about it: http://www.w3schools.com/dom/
In short, the DOM Model describes how an XML document is organized into a tree structure, and the DOM Interface provides methods for reading, searching and manipulating the leaves and branches of this tree. JSON is another way of describing hierarchical data. Once you have converted hierarchical data (either XML or JSON) into an hEntry then you use the DOM Interface methods to work with the data.
The Entry object provides a couple of static methods for turning hierarchical data into an hEntry: fromJSON() and fromXML(). Since they are static methods, this means you can call them using either an existing Entry object - e.g. work.fromJSON() - or by using the Class itself: com.ibm.di.entry.Entry.fromJSON(). Since you have methods for turning an hEntry into an XML or JSON representation, this makes JSON to XML conversion as simple as:
xmlString = work.fromJSON(jsonString).toXML()
And note that the above snippet will not change the contents of work. We're just making use of the static methods.
So much for the theory. You can easily play with this using the Javascript View at the bottom of your TDI Workbench, or by firing up the Debugger. Stay tuned for the next part of this discussion.
Subscribe To

 Posts
All Comments
Ramblings on the paradigm-shift that is TDI.
Friday, September 13, 2013

Wednesday, June 12, 2013
Shortcuts to faster workflow
I'm an incremental developer - a habit formed by over a decade of TDI, as well as cutting my programming teeth on Turbo Pascal back in the day. To speed things up I have a number of keyboard shortcuts defined in TDI.
The main ones are:
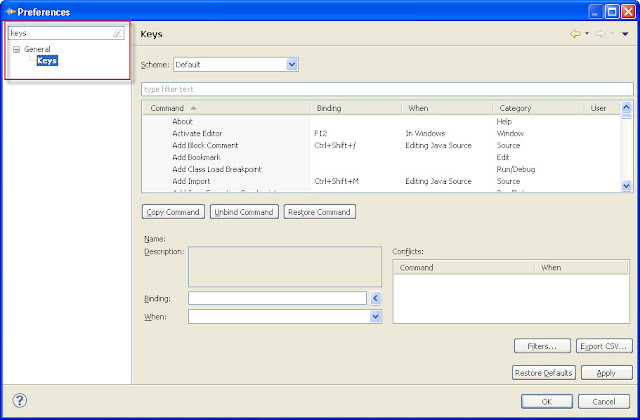
This gives you the keyboard shortcut editor. Now type assemblyline in the search field at the top.
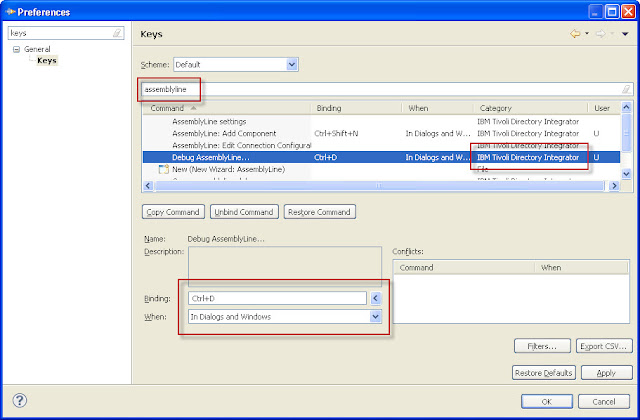
Choose Debug AssemblyLine from the list, making sure it's the one for TDI, and add the shortcut. Note to select In Dialogs and Windows. Now do the same for Run AssemblyLine.
Now change the filter to step and choose Step Into and Step Over (again, making during they're for TDI operations). Finally filter on continue and bind that command.
After you press OK at the bottom of the editor dialog you are ready to quickly launch, debug and step your way to new solutions!
The main ones are:
- Ctrl-R to run the current AL
- Ctrl-D to debug it
- Ctrl-DownArrow for Step Over
- Ctrl-RightArrow for Step Into
- Ctrl-Shift-DownArrow for Continue (to next breakpoint)
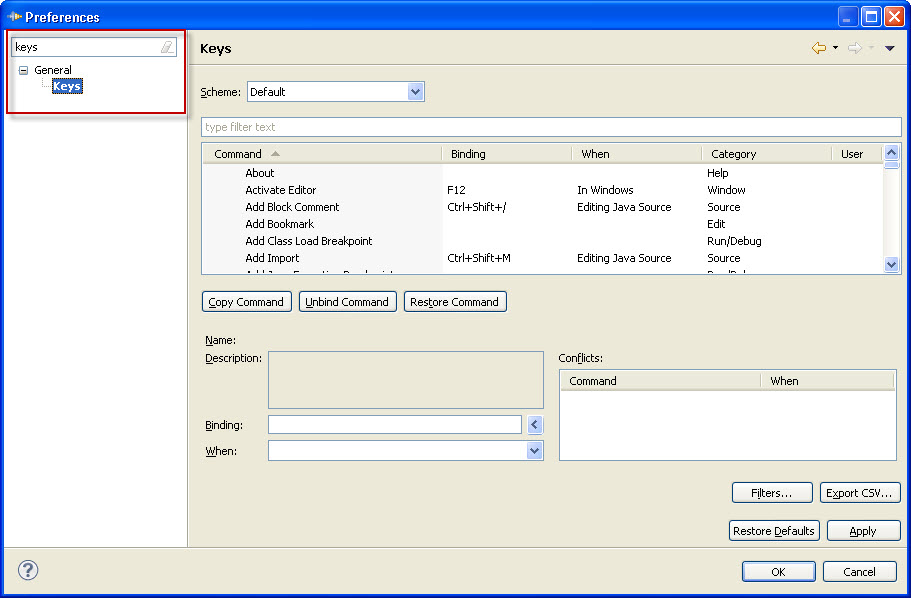
This gives you the keyboard shortcut editor. Now type assemblyline in the search field at the top.
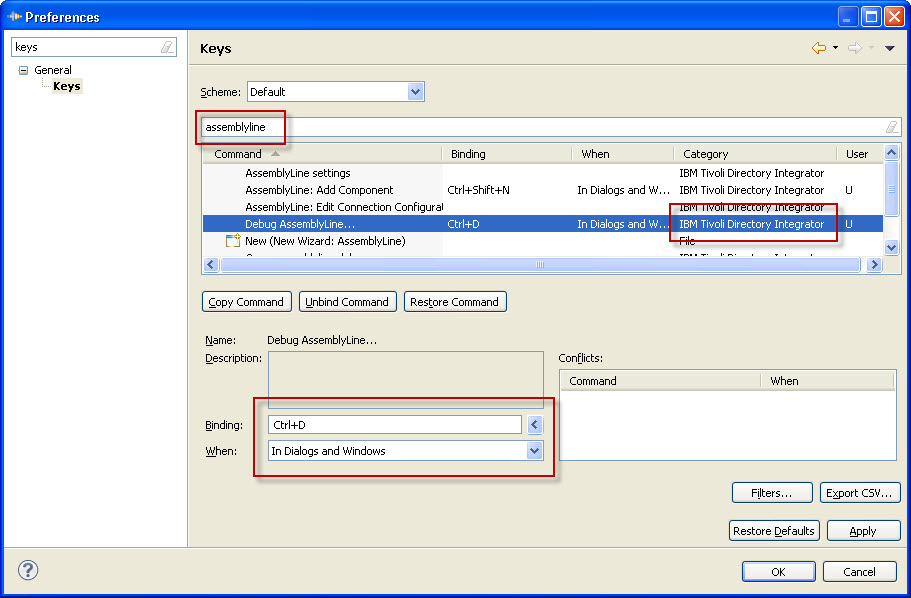
Choose Debug AssemblyLine from the list, making sure it's the one for TDI, and add the shortcut. Note to select In Dialogs and Windows. Now do the same for Run AssemblyLine.
Now change the filter to step and choose Step Into and Step Over (again, making during they're for TDI operations). Finally filter on continue and bind that command.
After you press OK at the bottom of the editor dialog you are ready to quickly launch, debug and step your way to new solutions!
Monday, October 1, 2012
In Norwegian, IT is sexy
Literally. The word it actually translates to 'sex appeal'. Just had to share that.
Call a stored procedures that perform an update
Got this nifty bit of script from Janne Lahteenmaki for calling a stored procedure that performs an update, and since Janne has been sent his Metamerge pen for community contribution, it's only proper that the community receives the tribute.
In this example there is a JDBC Connector in the AL named 'connDB2':
In this example there is a JDBC Connector in the AL named 'connDB2':
var command = "{call LLP.FOOBARPROC (?,?,?)}";
var rs = null;
var cstmt = null;
// wrapping it all in a try-catch in case something goes awry
try {
// Stored procedure call
// Get open connection from JDBC Connector
con = connDB2.getConnector().getConnection();
// Prepare the statement
cstmt = con.prepareCall(command);
// Assign IN parameters (use positional placement)
cstmt.registerOutParameter (2, java.sql.Types.INTEGER);
cstmt.registerOutParameter (3, java.sql.Types.INTEGER);
cstmt.setString(1, "1");
// Make the call
cstmt.execute();
// Get results
var out1 = cstmt.getInt(2);
var out2 = cstmt.getInt(3);
// Print them out
task.logmsg("out1="+out1);
task.logmsg("out2="+out2);
}
catch(e) { // oh oh - something bad happened
task.logmsg("EXCEPTION"+e);
var out1 = cstmt.getInt(2);
var out2 = cstmt.getInt(3);
task.logmsg("out1="+out1);
task.logmsg("out2="+out2);
}
His stored procedure looks like this:
CREATE PROCEDURE foobarproc (
IN ikayttajatun CHAR(8),
-- output arvot
OUT out_pk1 INTEGER,
OUT out_pk2 INTEGER
)
P1: BEGIN
-- Declare cursor
-- ################################################################
-- # Replace the SQL statement with your statement.
-- # Note: Be sure to end statements correctly (usually ';')
-- #
-- # The example SQL statement SELECT NAME FROM SYSIBM.SYSTABLES
-- # returns all names from SYSIBM.SYSTABLES.
-- ######################################################################
-- paluukoodit
INSERT INTO TFB (ID) VALUES (ikayttajatun);
SET out_pk1 = 0;
SET out_pk2 = 0;
END P1
Thanks, Janne, for sharing!
Saturday, September 22, 2012
A View to an NSF
Let's say you have a Notes Document with a lot of fields, including some fat ones - like rich text, images and other wads of data. Even if you are only interested in a subset of the fields, iterating can be agonizingly slow since the TDI Notes Connector retrieves the entire Document for each Entry returned. However, if there is a View available that contains the fields you need then there is a way around this that Rick Chapman and I discovered.
Start with your Notes Connector in Iterator mode, configured so that it is ready to pull Documents from your nsf. Then you add some Hook script magic to do the following:
Prolog - After Initialize:
// first get the Connector Interface (Notes Connector) in a handy variable
var dom = thisConnector.getConnector()
// This gets a reference to the db using the 'Database' param of the Connector
var db = dom.getDominoDatabase(dom.getParam("Database"))
// Note that any \ in the View name must be changed to /
// Some notes about the View-related objects and methods
// views = db.getViews() returns all views for db
// views.length returns the number of views
// viewEntry.getColumnValues() gives you all the column values for this View entry
// view.getColumns() returns the column names
var viewName = "98. Admin/DB2 Engagement Form Sync"
var view = db.getView(viewName);
// Prepare our entry counter. The first time around in the Override GetNext Hook we
// will return the first entry of the View, and on subsequent cycles we'll grab the next entry.
var counter = 0
// Retrieve the view entries
var col = view.getAllEntries()
// Get the column names
var colname_vec=view.getColumnNames()
Override GetNext:
if (counter == 0) {
viewEntry = col.getFirstEntry()
} else {
viewEntry = col.getNextEntry()
}
Start with your Notes Connector in Iterator mode, configured so that it is ready to pull Documents from your nsf. Then you add some Hook script magic to do the following:
- As part of Connector initialization (or just after), use the open Domino database to get access to your View; For example, in the Prolog - After Initialize Hook of your Notes Iterator. Here you retrieve the View Entries and the list of columns (fields) in the view.
- Instead of letting the Notes Connector retrieve Documents via its own getNext() functionality, you implement your own Entry retrieval logic by coding the Override GetNext Hook. This script grabs the next View entry and puts the columns in the Work Entry as attributes.
Prolog - After Initialize:
// first get the Connector Interface (Notes Connector) in a handy variable
var dom = thisConnector.getConnector()
// This gets a reference to the db using the 'Database' param of the Connector
var db = dom.getDominoDatabase(dom.getParam("Database"))
// Note that any \ in the View name must be changed to /
// Some notes about the View-related objects and methods
// views = db.getViews() returns all views for db
// views.length returns the number of views
// viewEntry.getColumnValues() gives you all the column values for this View entry
// view.getColumns() returns the column names
var viewName = "98. Admin/DB2 Engagement Form Sync"
var view = db.getView(viewName);
// Prepare our entry counter. The first time around in the Override GetNext Hook we
// will return the first entry of the View, and on subsequent cycles we'll grab the next entry.
var counter = 0
// Retrieve the view entries
var col = view.getAllEntries()
// Get the column names
var colname_vec=view.getColumnNames()
Override GetNext:
if (counter == 0) {
viewEntry = col.getFirstEntry()
} else {
viewEntry = col.getNextEntry()
}
// check for End Of Data (EOD)
if (myEntry == null) {
result.setStatus(0) // signals EOD
return // exit the Hook and end Iteration
} else {
result.setStatus(1) // this means there is still data available
}
counter++ // must remember to increment our entry count
// Display a read status message for every 200 entries
if (counter % 200 == 0 ) {
task.logmsg(thisConnector.getName() + " entry count: " + counter)
}
// Return all column values
vec = viewEntry.getColumnValues()
// Overriding GetNext means no Input Map, so the column fields must be put in the Work Entry here
for (i = 0; i < vec.length; i++) {
work[colname_vec.elementAt(i)]= vec.elementAt(i)
}
And that's all there is to it! And note, gentle reader, that I have not tested this code - simply copy/pasted it from a project I assisted with. So if you find any problems here then please let me know and I will rectify this post :) Thanks!!
Monday, February 13, 2012
Certificate chain chain chaining error
You're trying to connect to an https server but get an SSL handshake exception. The error message tells you that the certificate you received from the secure server is not trusted. What does this mean, and what do you do about it?
This exception means that the cert you got from the server is not in your TDI truststore - the one referenced by the javax.net.ssl.truststore property - or it is signed by another certificate that is not found there. To fix this issue you have to get necessary public key certificate and import it into your truststore.
So how do you get hold of this cert? If you know the admin(s) for the server then you can request it from them. Another approach is to connect and blindly assume that the certificate recieved is trusted. Some browsers allow you to save the cert to file. You can also use the Java utility provided in this article.
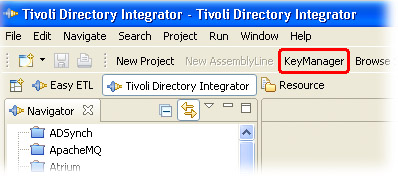
Once you have the certificate file you import it into your truststore either by using the commandline utility, keytool, found in the jvm/jre/bin folder of your TDI installation, or by using the iKeyMan application linked in button bar at the top of the TDI Configuration Editor (CE).
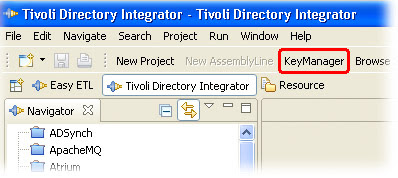
This exception means that the cert you got from the server is not in your TDI truststore - the one referenced by the javax.net.ssl.truststore property - or it is signed by another certificate that is not found there. To fix this issue you have to get necessary public key certificate and import it into your truststore.
So how do you get hold of this cert? If you know the admin(s) for the server then you can request it from them. Another approach is to connect and blindly assume that the certificate recieved is trusted. Some browsers allow you to save the cert to file. You can also use the Java utility provided in this article.
Once you have the certificate file you import it into your truststore either by using the commandline utility, keytool, found in the jvm/jre/bin folder of your TDI installation, or by using the iKeyMan application linked in button bar at the top of the TDI Configuration Editor (CE).
If you haven't changed the default security setup then the truststore will be the testadmin.jks file found in the serverapi folder of your Solution Directory. The default password is 'administrator'.
Once the certificate is imported, the SSL connection will work.
And, as always, thanks to Jens Thomassen for his invaluable insight and guidance!
Monday, November 21, 2011
Early Christmas Stocking Stuffers
Since this past summer, TDI 7.1 Fixpacks now include a number of new components. However, since they are dropped in the examples folder during fixpack updating and not under jars, they won't show up in the Add Component wizard until you make them available to your TDI installation. This can be done in a couple of ways, as I have outlined here.
To whet your appetite, here is a list of powerful new components provided under examples:
- TPAE IF Connectors include a 'Simple' version which is comparable to the 'Generic Maximo Connector', although it has been extended to work with a broader range of MBOs. The other TPAE IF Connector (without 'Simple' in its name) further enhances integration capabilities to Maximo application data.
- TPAE IF Change Detection Connector allows you to hook into change notifications coming from the Maximo integration framework, for catching and propagating new and modified data to any number of targets. And deletes.
- File Management Connector is for reading and modifying file system structures and file system metadata. More specifically, it can create, find and delete files and directories. You still use the 'File System' Connector to work with file contents, but now you could iterate through a directory and load each returned filepath into a File System Connector (for example, in a Connector Loop) to process the file.
- File Transfer Function component allows you to securely copy files between any two systems, either to or from a remote system, or between two remote systems.
- JSON Parser allows you to read serialized JSON into the hierarchical Entry-Attribute-value model of TDI where you can use features like XPath searches and 'DOM tree walking' techniques to access and manipulate parsed objects. And of course to turn an hierarchical Entry into a JSON stream. Makes going from JSON to XML, and vice versa, a snap :)
Subscribe to:
Posts (Atom)